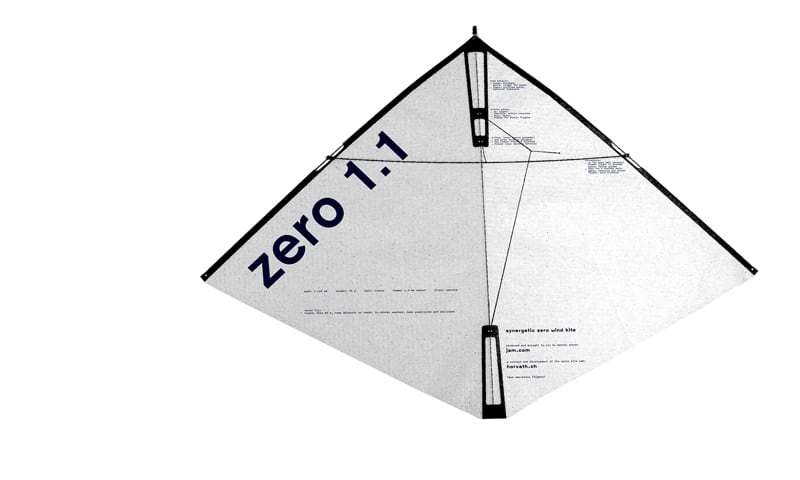
Improving a kite: zero 1.1
The licensed no-wind-kite "zero 1.1" is not being produced anymore, but you can find it in kite-shops worldwide. To enjoy a good flight, you can modify the kite and also, it wouldn't hurt to check the symmetry of the sail.
The modifications
There are options to modify a zero 1.1 first series kite for enhanced synergetic performance. This kite was licensed to Volango-Kitewalker some time ago. It was white with a lot of text printed on the sail. The last series were orange.
Most copies of Horvath-Kites don't consider the centering of the spine rod or tube either, and the exact symmetry out of the factory is random.
The nose detail for a consistent symmetry
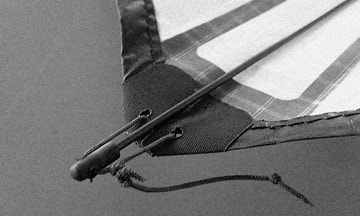
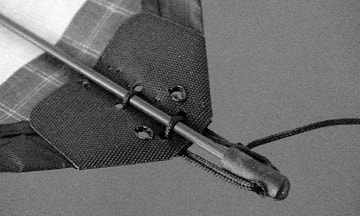
The original nose detail: The spine is moving left and right, making the kite instable in stronger winds.
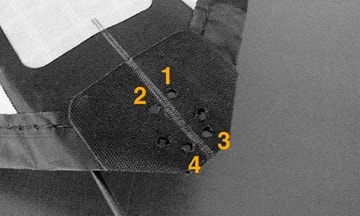
Make an accurate fixation of the spine: 4 holes very close to the center line instead of the 2 holes in the series.
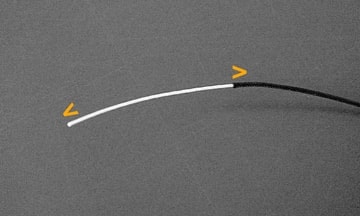
The core of a bridle line and the outer coating (the outer part of any bridle line): Separate the coating in order to get a soft line with good grip. The length is around 180 mm, you will shorten the line when the nose detail is finished.
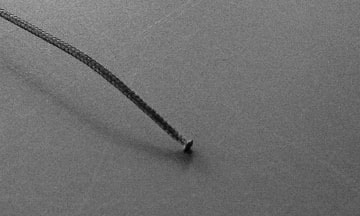
Make a solid flange at one end of the line, using pliers and a lighter.

Make a loop exactly as shown. We call this thing a "pen loop".
Tighten the loop around a pen. The stronger the more reliable the sail tension along the spine will be in flight.
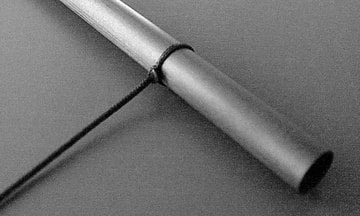
The nose tensioning line goes through all 4 holes as shown.
The nose piece is cut to be open at the tip to enable inserting of the line 2 times.
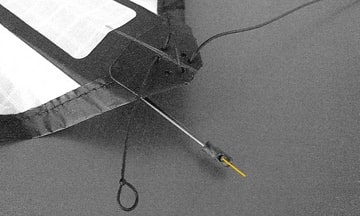
Now pulling the line towards the front of the kite will tension the sail along the spine. Zero tension is beautiful and best, just smooth out the last folds in the sail. Stronger tension will bend the spine, resulting in a more agile behavior of the kite, but don't overdo.
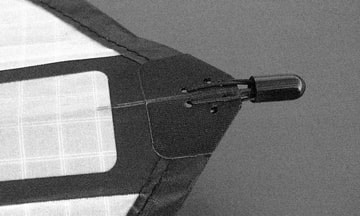
The vinyl cap is optional, just to smooth out the look a bit.
Shifting the leading edge connectors
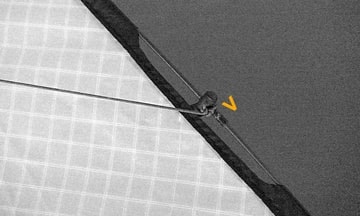
Push the leading edge connectors down by 1 cm. This will tension the x-line, while the sail will become looser.
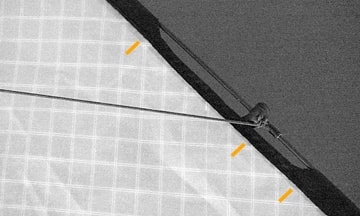
The new position is 1 cm or a bit lower than in zero 1.1 kites of some series.
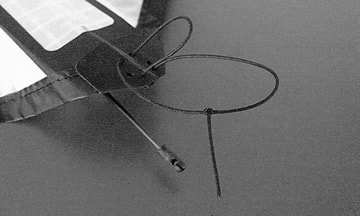
Option: flying the kite with a tail
If you like very long kite tails as we do, make 2 small holes at the stern of the kite, on each side of the spine and attach a short line with a knot at the end. The detail is looking similar to the nose. Now the kite is prepared for flying with a long tail.
The tail can be excessively long if you take a light material with low drag. Something like 100 m of vhs or wider video-tape, it's floating by itself. The kite isn't loaded by additional weight. The "urban ninja" loves long kite tails in a slight wind too. Upon request, we have beautiful long white kite tails in stock, good for the urban ninja and larger kites, but not for smaller ones.